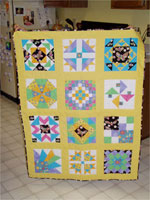
Here’s a photo of Andrew’s bug quilt (the same photo, in fact, that supplied the image up in the blog header). How did I get it to the blog so that I could show it off to the rest of you, and how can you do the same thing with your photos?
It’s a bit complicated, but it’s kind of the main reason why I put the blog together, so stick with me here while we go through all the steps.
First off, you’ll need the photo. You’ll probably want to edit it somewhat after you take the picture, to reduce the size of the image (in pixels) and the size of the file (in kilobytes). Right now the blog is set up so that you can upload a photo as long as it’s less than 300kb in size – if that becomes a problem I can change it to a larger file size. You will probably want to make sure that the photo is no more than 500 pixels wide – that’s about how wide the main part of the screen is on most browsers. If you’re not sure how to do that, there are some ways around it that I’ll show you.
Once you have your image file saved on your computer, head to the “back end” of the blog and click on the link at the top that says “Upload.” You’ll see the screen for uploading a file, which looks like this:
Click on the “choose file” button and navigate to wherever you have your photo saved.* Once you’ve selected your photo, a little icon and the filename will appear next to the button.
*Mom and any other Macintosh users out there: if your photo is in your iPhoto library, ask me for help in how to find it.
The “description” box should just contain a few words about the photo – what you type here won’t show up on the entry, so don’t write a whole huge paragraph. For the photo I used in this entry, it just says, “Andrew’s bug quilt.”
The last bit gives you the option of creating a small “thumbnail” of your image, which appears on the blog entry. If a reader clicks on the image, they’ll be taken to the full-sized photo. This is a good option if you’re not sure how to resize your photo so that it’s less than 500 pixels wide. For the photo I used in this entry, I already had it shrunk down pretty small, so I didn’t bother.
When you click on the “upload file” button, you SHOULD get a message that indicates that your file uploaded successfully. If you don’t, let Cathy know! With luck, she can fix whatever the problem is. You’ll also get another very important piece of information: the code that you should use in your blog entry to get the image to show up:
Just copy that line of code, and paste it into the main part of your entry, like this:
That’s all there is to it! It’s a lot of steps, but it should work. You can also (I’m pretty sure!) use a photo in a comment: just cut and paste the link into the comment text. As always, if it doesn’t work for you, ask Cathy! Now:
Your last assignment: post an entry or a comment with a photo!
SPECIAL BONUS GEEK INFORMATION: As an added bonus, you can use the file-upload space as web hosting for photos that you want to use elsewhere. You’ll need to edit the link just a bit, but it should work, if you don’t have web-hosting space anyplace else. So for example, if I wanted to link to the photo above on a completely different website, I’d change the link to read: src=”http://www.crackpotquilters.net/wp-content/photos/bugquilt.jpg”. If you have no idea what this means, don’t worry! But if you do know what I’m talking about, feel free to use it! We have lots more disk storage space and bandwidth quota than we will ever need.