Archive for the ‘How to use the blog’ Category

How to post an entry

Saturday, December 24th, 2005

Now we get to the really fun part: posting an entry! Let’s say you’ve just completed a project of some sort and you want to show it off, or you’ve got a question and want some advice from the other Crackpots. Post an entry to the blog, and let the other Crackpots comment on your project, or answer your question.

To post an entry, you’ll need to be in the “back end” of the blog, so the first thing you’ll want to do is click on the “Site Admin” link in the left-hand sidebar to get to the back end.

Once you’re there, you’ll see the Dashboard, just like you did when you first logged in. The second link on the top of the page, right next to “Dashboard,” will say “Write.” This is the link you use when you want to write an entry. When you click on it, the basic entry-writing interface appears:
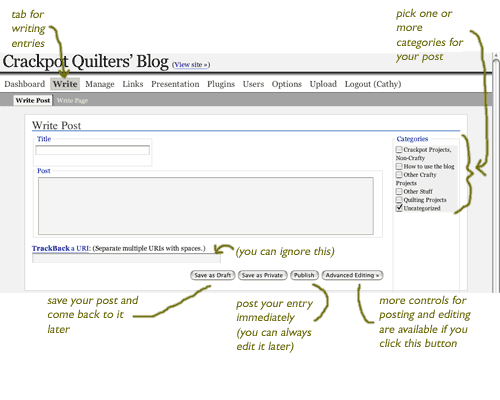
the screen for writing an entry

Each entry has a title (the title of this entry is “How to post an entry”) and the main block of text (this is the main block of text for this entry).

You can also designate one or more categories for your entry – this is helpful if you want to see all of the “how to use the blog” entries, or all of the quilting project entries. I’ve set up a few categories that I thought might be useful, but you can add new categories! Just go to the “Manage” link at the top, and choose “Categories” and then click on “Add New.” If you’ve got an entry that doesn’t fit any of the current categories, go ahead and add a new one!

Once you’ve written your entry, you have three options: post it immediately (the “Publish” button), save it and come back to it later (the “Save as Draft” button), or save it as a “private” post that only you can see. I’m not sure what use the “save as private” option is, but if someone can think of a use for it, please post a comment to that effect!

There’s also a button that gives you access to some advanced editing features. The most useful of these is the ability to set the date and time that your entry will appear – like post-dating a check – so that you can write an entry about a project that’s a surprise, and then post-date it so that the entry only shows up after the surprise-ee has been surprised. Another useful function that you can use on the advanced screen allows you to preview your entry before you post it.

That’s about all there is to say about writing an entry, so let’s go ahead and do
your next assignment: post an entry to the blog!

(Coming up next, the pièce de resistance: uploading an image!)

How to post a comment to the blog

Wednesday, December 21st, 2005

Okay! Now you’re logged in and ready to get going. Here I’ll explain how to post a comment to an entry that someone else (or you!) has already posted. This is actually pretty easy and self-explanatory, so if you’re feeling anti-authoritarian, just skip to:

Your next assignment: post a comment to this entry!

To post a comment to an entry, just click the link below that entry that says “No Comments” or “2 Comments” or however many comments there are:

where to click when you want to comment on an entry

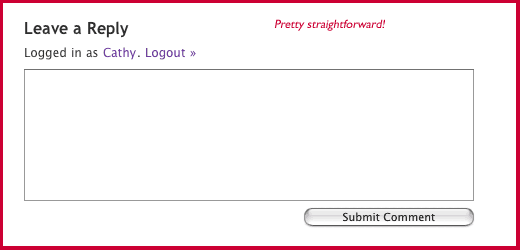
The comment-writing interface is fairly simple, because it’s designed for anyone in the whole world (not just you Crackpots) to use:

the comment interface: easy!

That’s the idea behind blogs, basically: one or several people put their ideas on the web, and everyone else comments on them and joins a conversation. However, this blog operates a little differently: we don’t necessarily care what everyone in the world thinks of our quilts and other Crackpot projects, so I’ve constructed the blog so that only the five of us can comment.

You have to be logged in to comment, and if for some reason you’ve gotten logged out and try to post a comment, the blog will make you log in first. But you already know how to do that, right? So go ahead and try….

Your next assignment: post a comment to this entry!

How to log in to the blog

Wednesday, December 21st, 2005

Okay, here we are at the bottom of the page!

So, the first thing you’ll want to do is log in to the blog, so that you can post comments on other people’s entries (or even on your own!) and post entries of your own.

Over in the right-hand sidebar, there’s a section labeled “LOGIN HERE”. It should look like this:

Where to log in

Click on the link for “Login,” and you’ll be taken to a login screen that asks for your name and password (which is what you got on the little card in your gift box). Both the name and the password are case-sensitive, so pay attention to capitalization! Also, you can change your password if you like, and if you ever forget your password, there’s a link on the login page to reset it. Or, just let Cathy know and she can reset it for you.

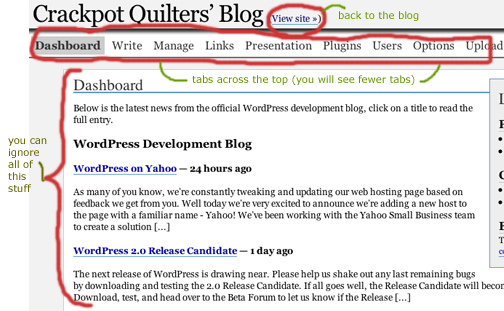
Once you’ve logged in, you’ll be taken to a page called the “Dashboard,” which looks something like this:

What the Dashboard looks like

This page contains news and information for people who administer blogs, but you can ignore all of it – that’s for Cathy to worry about. There are also links across the top for things you can do with the blog, like write entries or update your user information – we’ll get to all that later.

This whole side of the blog is the “back end” — the part where the internal workings of the blog happen — and it looks very different from the “front end” so it’s easy to tell which side you’re on. To get back to the front end of the blog, click on the link at the top of the page next to the title that says “View site.”

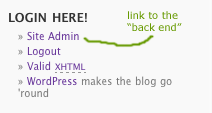
Once you’re back at the blog, you’ll know you’re logged in, because the links under “LOGIN HERE” will change and look like this:

What it looks like when you\'re logged in

“Site Admin” is the link that takes you to the back end – you’ll need this later when you decide to post an entry.

Your first assignment: log in using the link in the sidebar on the right, and then come back and read the next entry, “How to post a comment to the blog.”