Archive for February, 2008

My Online Class

Sunday, February 24th, 2008

For the past month I have been taking an online class through www.joggles.com. It is Mixed Media Surface Design for the Textile Artist. Sue Bleiweiss is the instructor for this class (www.suebleiweiss.com, www.fibreandstitch.com). It has been way too much fun!

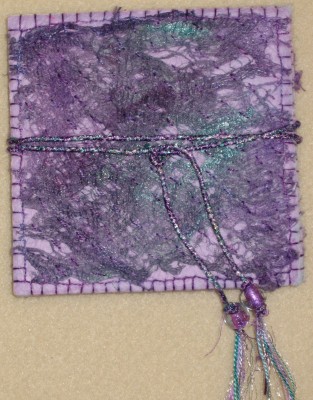
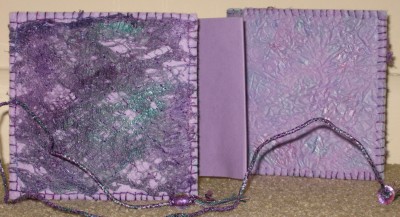
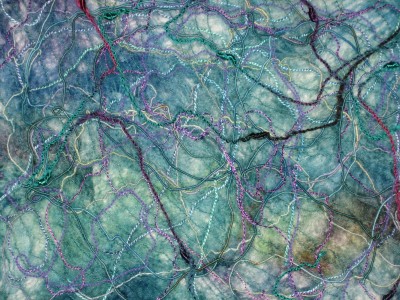
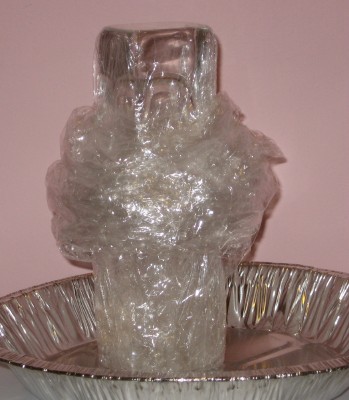
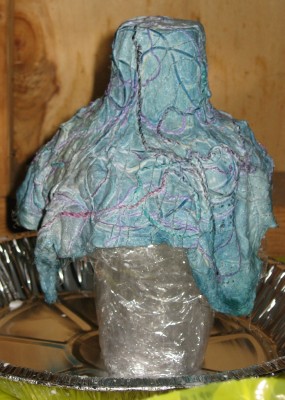
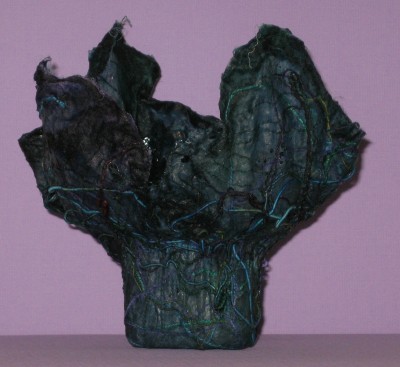
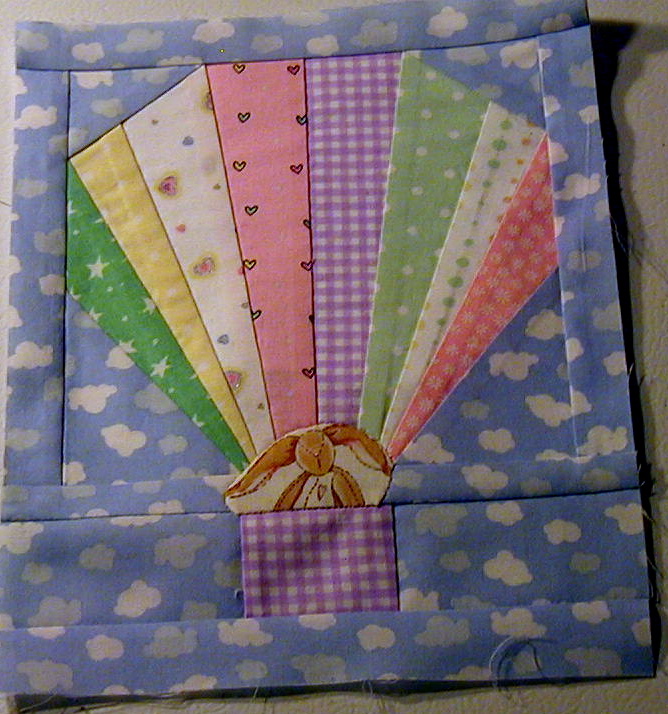
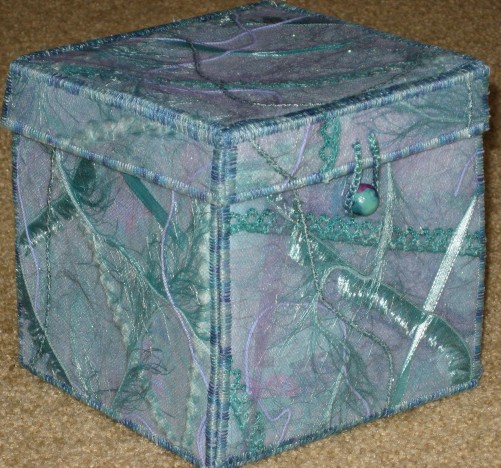
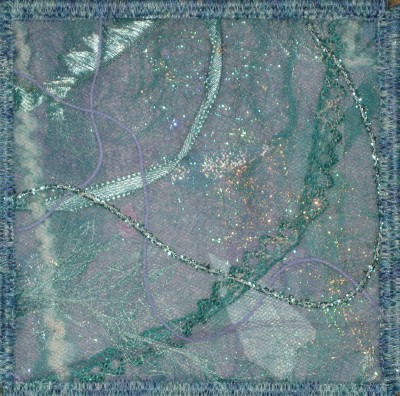
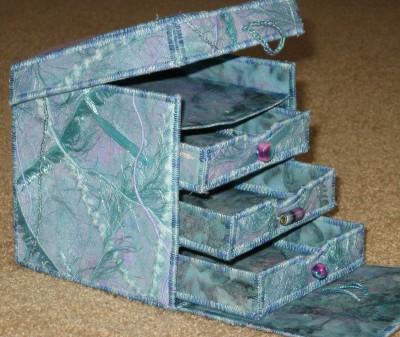
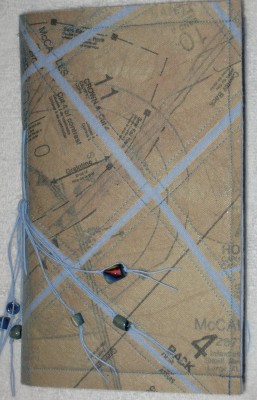
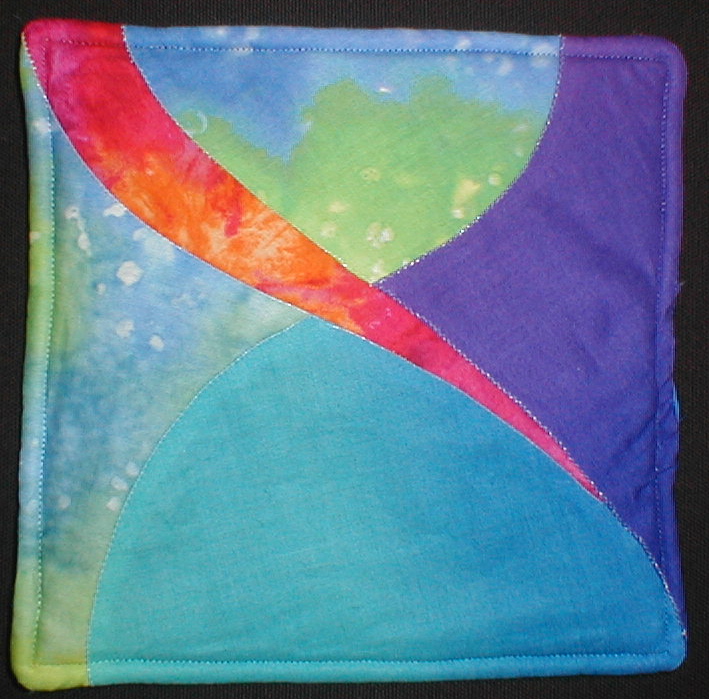
The class focuses on using fabric, paper, paint, and all sorts of embellishments to create fabric for other projects. We’ve used tissue paper, pattern paper, paper towels, mulberry bark, paper bags, and silk hankies (unspun silk) to make fabric to use for a vase, little books, a box, and a portfolio. The class has given me the confidence to try some materials I have read about.

I wasn’t sure how I would like the online format, but I am very pleased. Class members are sent a new lesson to download each week. The directions are quite clear, and there are lots of pictures. Sue Bleiweiss is available to answer email questions for the most part of every day. I’ve also enjoyed the online forum where class members share their experiences and post photos of their work, but this is optional, and not everyone participates. The written lessons work well for me because I’m a “read the directions to learn” person. If you were a “watch the demonstration” person, I’m not sure it would work as well. I also like the extended time to ponder my options. I can spend time rooting around in my stash (or perpetrating an Economic Stimulus Package at one of the local craft or fabric stores) to find exactly what I want to use.

I’m pretty sure I’m not an artist, but some of the people in the class are. It has been fun to look at their blogs and websites.

Concertina Book

Wednesday, February 13th, 2008

This is the mulberry bark concertina. The bark came dyed purple with a little jade green. Because my piece was about 3″ by 15″, I needed to modify the size somewhat. First I soaked the bark in warm water for a few minutes. Then I could pull it apart and stretch it a little. After it dried, I decided it needed a little more intense color. So I used some Dye-Na-Flow and Lumiere. I added a little Pearl Ex for extra sparkle.

concertina

I wasn’t crazy about the color combination of my light blue felt and the purple and jade mulberry bark. So I fused some tissue paper to the felt and further doctored it up by stamping some iridescent paint on top. I then used a diagonal running stitch and some silk embroidery floss to stitch the bark to the felt. I used that same floss to use the buttonhole stitch to hold the outside cover to the inside cover.

The cord is about 8 strands of fairly thin fiber zigzagged together with three colors of metallic thread. One thing I did was to separate some silver floss before twisting it in with the other fibers. I liked that effect. In retrospect, I probably did not need to spend half an hour choosing the precise fibers to go in the cord and I did not need to use any silk floss. The subtleties don’t show. But I’m pleased with the overall effect.

The silk cocoons seemed a little large for the book so I used beads on the end of the cord.

open concertina

The hardest part of the whole process was finding where my box of sewing machine needles was hiding. AARGH! It was in with fusibles under the Misty Fuse. So much for the ill-fated effort at straightening up the sewing room after 8:00 p.m.

Paverpol vase finished!

Tuesday, February 12th, 2008

I finished my vase made from a “silk hankie” (un-spun silk fibers) and hardened with Paverpol, a fabric hardener from the other Holland.

First I took the already dyed silk hankie and added various decorative threads scattered across the top. It was sandwiched between water-soluble stabilizer and then stitched in a manner I would call diagonal, curved, semi-parallel stitching. (Mathematicians are gagging–we know who they are).

silk hankie

Then I made the mold. This is a vase thoroughly covered with kitchen plastic wrap. The Paverpol apparently sticks to everything except plastic. Because I wanted a narrow bottom and a flared-out top, I wrapped quite a bit of plastic wrap around the middle of the vase to support the flare.

mold

Then I painted the silk hankie with the Paverpol. I wore plastic gloves and used a plastic bag under the silk hankie. I shaped the hankie over the mold and left it to dry in the basement for three days.

on mold

Then it was time to remove the vase from the mold. I thought it would just slip off. No. I pulled out the plastic wrap supporting the flare and cut out as much as I could around the vase. From there it was just brute strength, of which I have plenty due to my rigorous exercise regimen.

finished vase

This class has been too much fun!

Is this cute or what?

Saturday, February 9th, 2008

Here is the completed first block for Blanka Janosi’s quilt, and I am inordinately pleased with it.

balloon block

As I was working on the piecing, I had the thought that it would be cute to applique little animals or children in the basket, but I told myself that it would probably be hard to find a fabric in the right size print, of an appropriate color, and sufficient cuteness. But as soon as I looked in my stash, there it was! It is left over from Christina Shumann’s quilt. In addition to the bunny, who looks a bit alarmed at finding himself airborne, there are duckies, sheep, and bears. The plan for the quilt is to have 5 pieced blocks like this one alternating with 4 sky blocks in a 9×9 grid. The applique was done with the classic (aka outmoded) needle turn technique, but it only took me 20 min. to do the bunny, so even She Who Hates Applique is not complaining. I am thinking that I will want to do something snazzy with multiple borders, but we’ll see about that at a later date.

Three Drawer Box

Saturday, February 9th, 2008

The three drawer box is finished!

box

The fabric recipe is light blue felt, cheesecloth painted teal and purple, a few tissue paper fragments, blue tulle, stamping with silver and pearl turquoise to even out the tone, decorative yarn, lace and other fibers (some painted teal with Glimmer Mist), a few Angelina fibers, and purple tulle.

box fabric

I was waiting for more Misty Fuse to arrive so I used the closest thing I found–Fine Fuse from Quilters’ Resource. It is not quite as soft as Misty Fuse, but it worked pretty well.

I was quite pleased with the way the outer fabric turned out. I think it’s the two colors of tulle that I like.

As I was putting it together, I decided there was too much contrast between the inside and the outside of the box. So I used a sponge to stamp silver, pink and purple on the lining fabric.

The beads were some I picked up for 10 cents each with the knowledge I would use them somewhere… I used a variegated perle cotton to sew them on and I deliberately left the thread tails on the inside.

open box

Now, what to put in this little treasure chest?

The Next Project

Saturday, February 9th, 2008

I finally finished the third project for my online class. The the first layer for the cover fabric is pattern pieces fused to muslin. Then that fabric is cut up and fused to felt. Two layers of blue tulle are fused on top. If you look carefully, you can see that the pattern I used was for one of the Bear Suits.

sketchbook

Using the blue tulle gave the pattern pieces a little bit of a blue tinge that I liked. I did audition several colors of tulle before I picked the light blue.

The signatures (sets of pages) are white cardstock. Finding and then preparing the string to sew them in took a couple of tries. I didn’t like the look of white or natural colored string on the outside of the sketchbook. I found some vintage kite string in the junk drawer and used fabric paint to color it to match the felt. I ended up doing this twice because the first length was too short.

I wanted to embellish the strings somehow. My first attempt was braiding, with each set of four strings used together. That was not exciting. I played around with braiding a little more. Finally I found some instructions for making a 12 strand braid on a Cub Scout website. That was pretty cool, but not quite what I wanted. (For those who wondered, the pattern is over 8 and under 3.)

I then thought about beads. I didn’t think I had any beads with holes large enough for the string, and we were snowed in so there were no shopping opportunities. One idea was to make fabric beads to match the cover fabric. But then I went into my bead stash and found these. I picked them up last summer at our locally-owned, friendly yarn store for ten cents each. What a deal!

The title of this project is “The Sketchbook of Permanently Unfinished Ideas.” The first thing I plan to sketch in the book is the Finnish Knock-Off Project. It’s not only unfinished but also unstarted. But I now have another idea of how to do the knock-off.

Class sample turns functional

Sunday, February 3rd, 2008

Last year, Mom and I took an absolutely wonderful class on “applipiecing” from Caryl Bryer Fallert at the Chicago quilt show. Our class project was a small block. If any of you ever have a chance to take a class from this amazing artist, I highly recommend it.

I finally got around to doing something with that block – I made it into a trivet, using a square cut from a felted wool sweater as the batting. My goal was to produce something somewhat heat-resistant, absorbent, and machine-washable to use on an end table as something I could set my coffee mug on. It took a few tries to get the top, batting, and backing placed in the right orientation so I could sew them together and end up with both outsides on the outside, and the inside on the inside – but to my (small) credit, I realized the error of my second attempt much more quickly than on my first attempt. My seam ripper got a good workout on this project.

This picture was taken before my first use of the trivet – a good thing, since I managed to spill coffee all over it right away. (It did prove its absorbency and machine-washability, and is now back in use on my living room end table)

Fallert Trivet